Table of contents:
Intro
We don’t like using Photoshop. Honestly, we’re not fans of it—and we’re not particularly skilled with it either. And there’s a reason for that. In a world obsessed with efficiency, we prefer not to follow the same path. Instead of chasing efficiency, we better focus more on satisfaction, authenticity, and personal preference. Every photographer knows the joy of watching a new image come to life in the camera. It’s a far more rewarding process than making compromises during the shoot with the intention to fix them “later in post,” all while hoping everything comes together as planned.
Beyond the sheer satisfaction, this approach brings other crucial benefits, massively contributing to the quality and credibility of the final image.
Why do as much as possible in the camera when you could do it in post?
Our most essential piece of software is Capture One. It’s the application we connect to our camera during a photoshoot, allowing for tethered shooting (where images appear instantly on our laptop) and providing a robust environment for RAW processing.Our most essential software is Capture One. It’s the application connected to our camera during a photoshoot, allowing for tethered shooting (where images appear instantly on our laptop) and RAW processing.
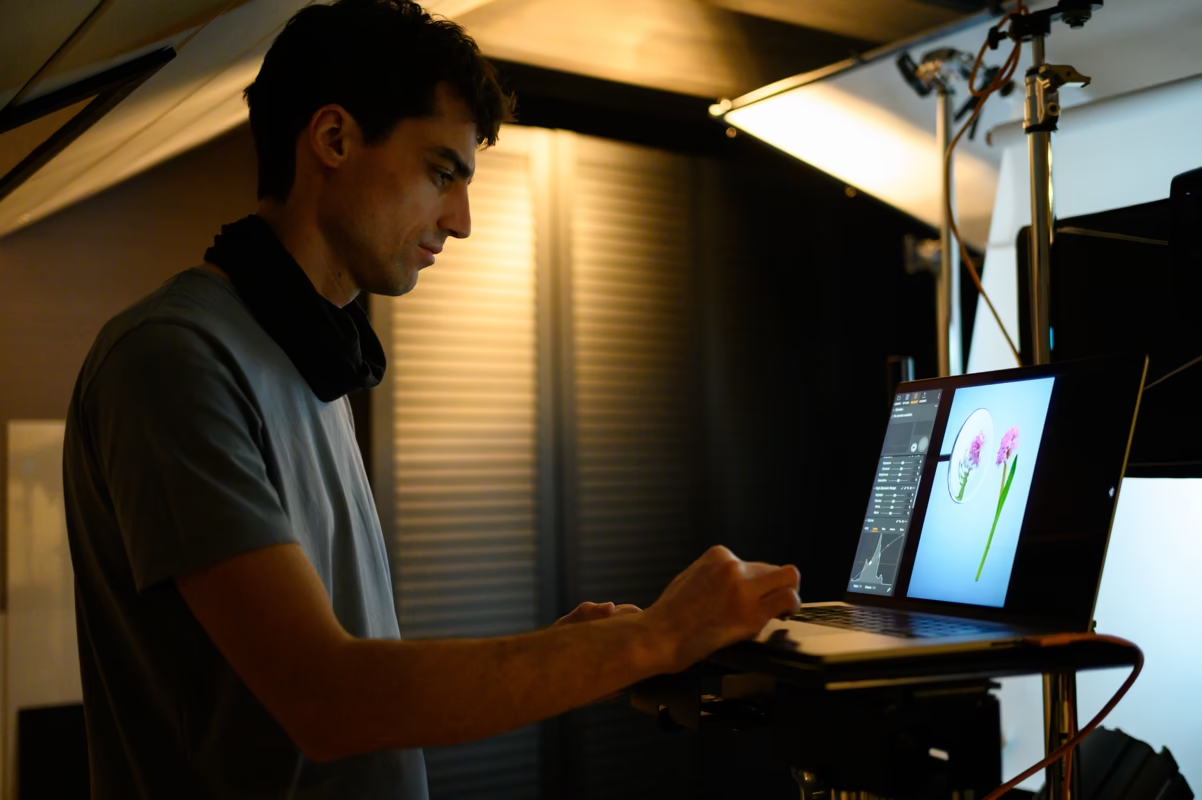
When it comes to editing color and tonality, Capture One is an incredibly powerful tool, more capable than Photoshop, because it works non-destructively with the original RAW data. Since precise color and tonality are cornerstones of our work, we want to leverage the power of the RAW format and Capture One for as long as possible during the editing, ideally right up until the image is nearly finished. Only then, when we can see an almost-complete image, can we make the final, critical judgments on its look and feel.
Modern versions of Capture One are also surprisingly capable when it comes to minor manipulations. We often use threads and support arms to position objects in our compositions. In most cases, these supporting elements can be removed directly within Capture One during the shoot. This workflow allows us to see a nearly final version of the image right there in the studio, giving us the chance to make immediate adjustments.
Creating the “Liquid Mirror” Effect
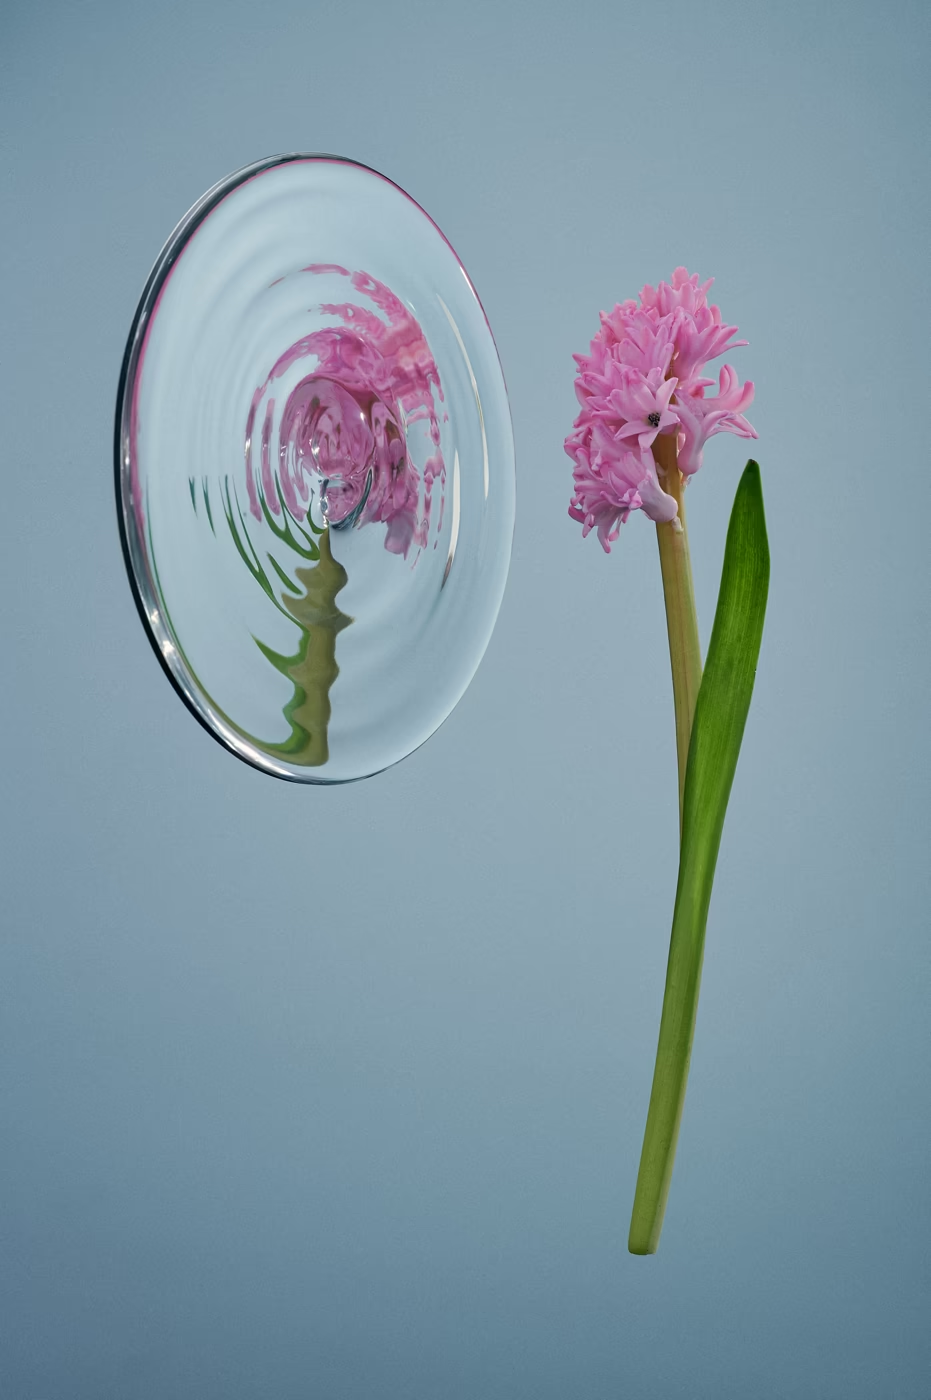
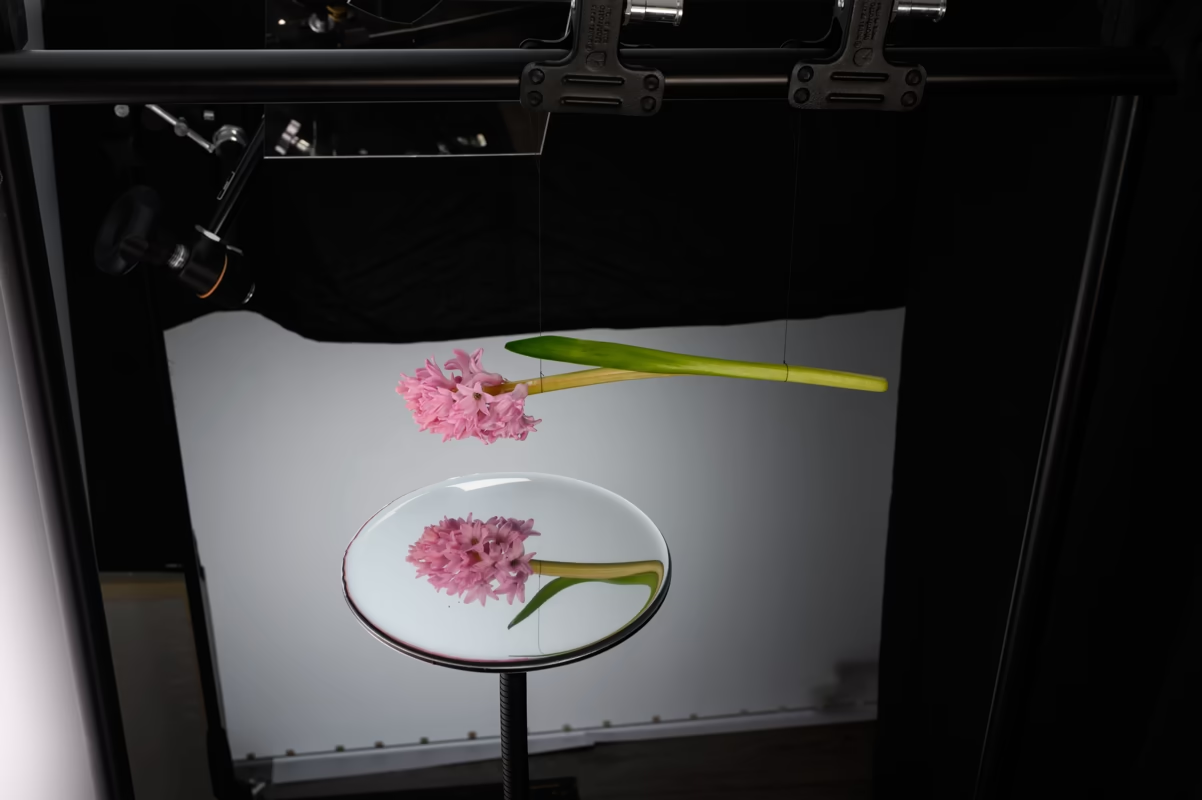
To show our philosophy in action, let’s break down how we created the “liquid mirror” effect for our photograph, “Looking at Yourself”—all without Photoshop or any other digital manipulation tricks.
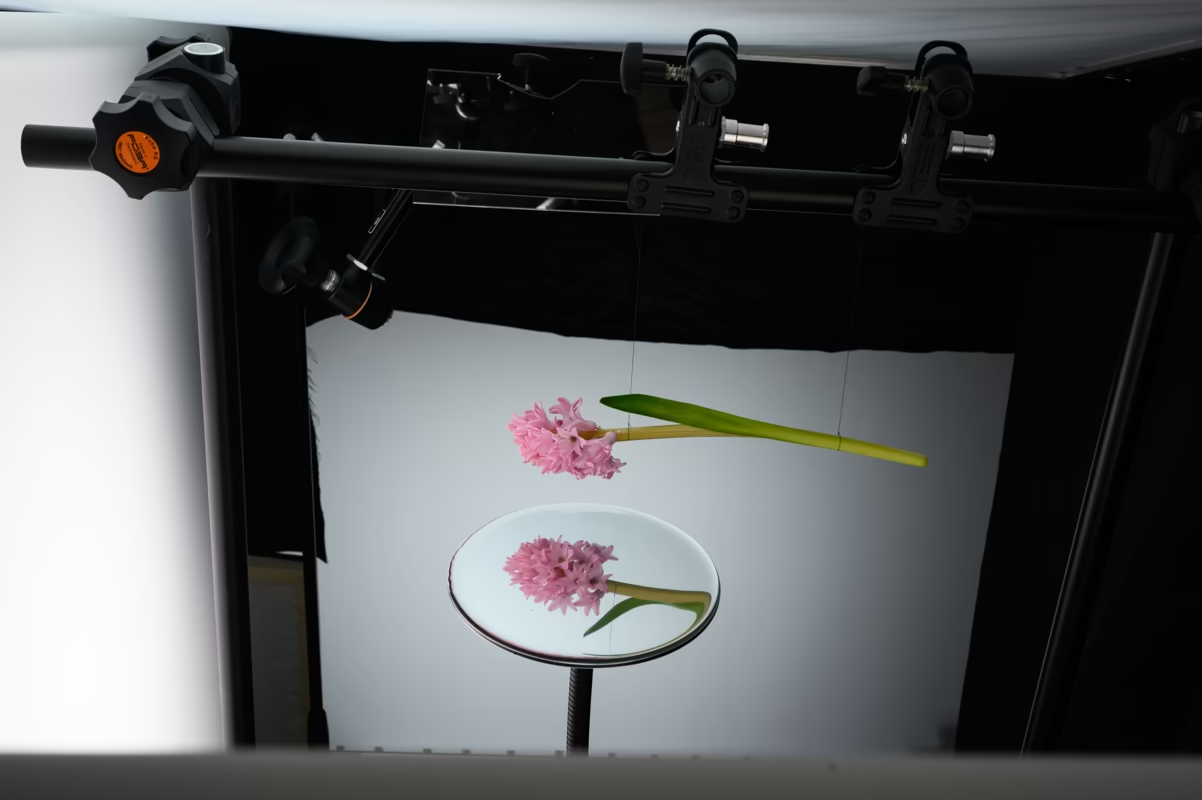
The magic behind this effect lies in a simple scientific principle: cohesion. Water molecules cling to one another, allowing you to pour a surprising amount onto a flat surface before it spills. We often start with one glass of water, only to find we need several more to cover an entire mirror.
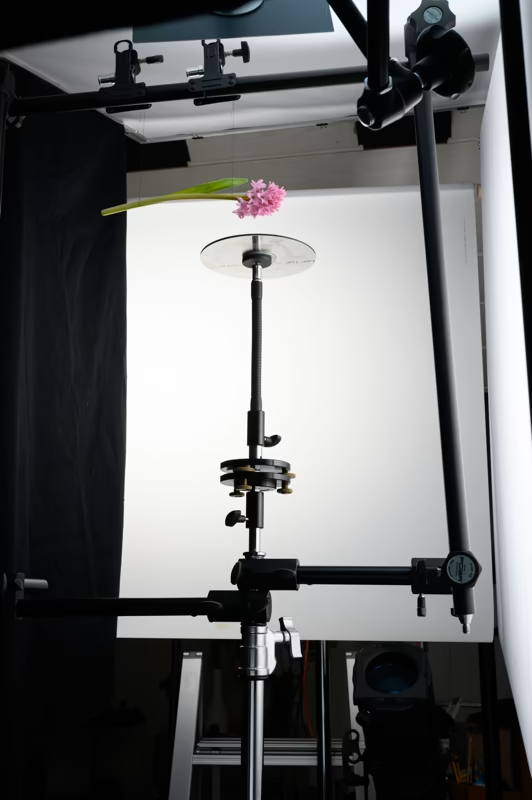
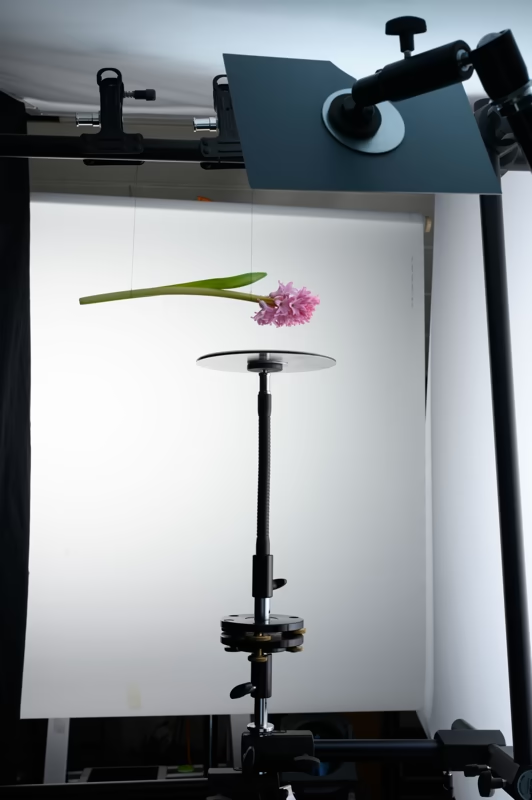
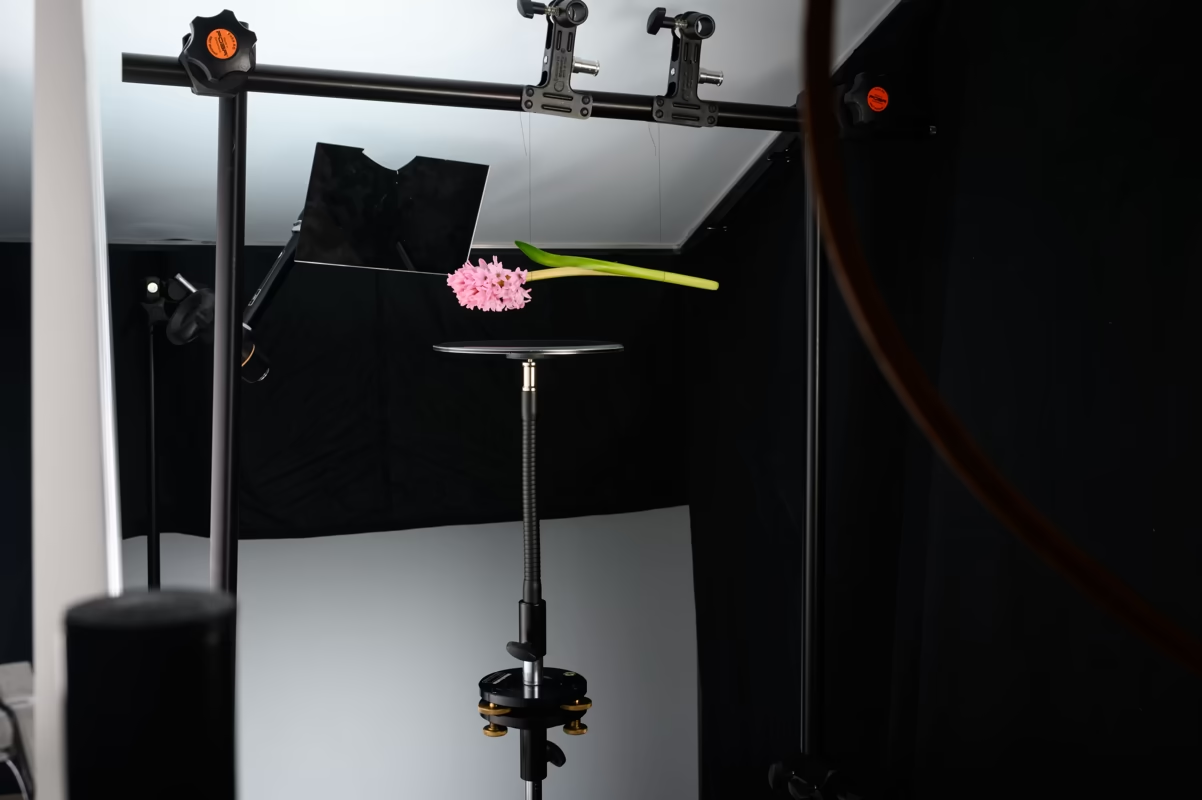
To make this work, the mirror must be perfectly level. The creative challenge, however, is to create the illusion that the mirror is standing vertically. We achieved this by:
- Simulating a “Bottom Edge”: We used black fabric to cast a shadow along the edge we wanted to appear as the bottom.
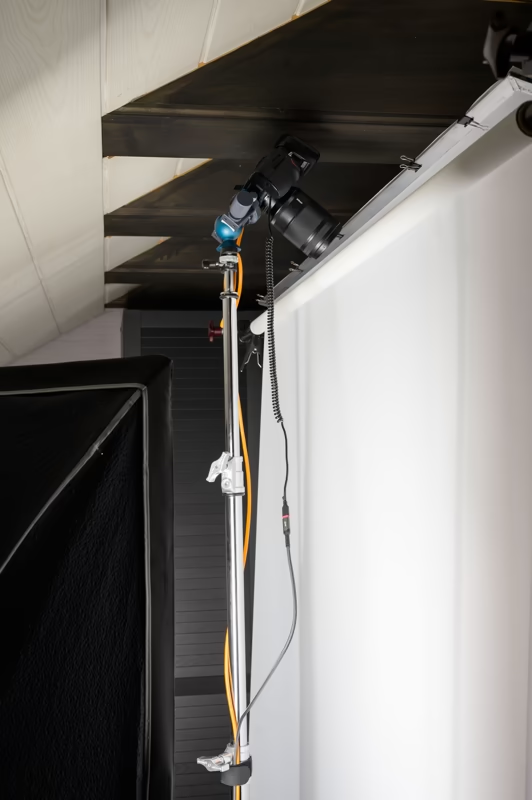
- Simulating a “Top Edge”: We placed a large diffuser with a light behind it to create a soft, bright gradient, mimicking light from the sky.
Next, we secured the flower in place with thin black threads. These were so fine that we could easily remove them in Capture One as we were shooting. Once again, seeing the almost-final result live in the studio was invaluable. It allowed us to refine that extra 5% of quality that ultimately separates a good image from a great one.

The only element we thought might require Photoshop was the heavy support holding the mirror itself. However, in this particular image, we successfully managed to remove it directly within Capture One with the simple healing brush.
Final result
And there you have it! This approach allows us to bypass Photoshop for the vast majority of our work.
