Table of contents:
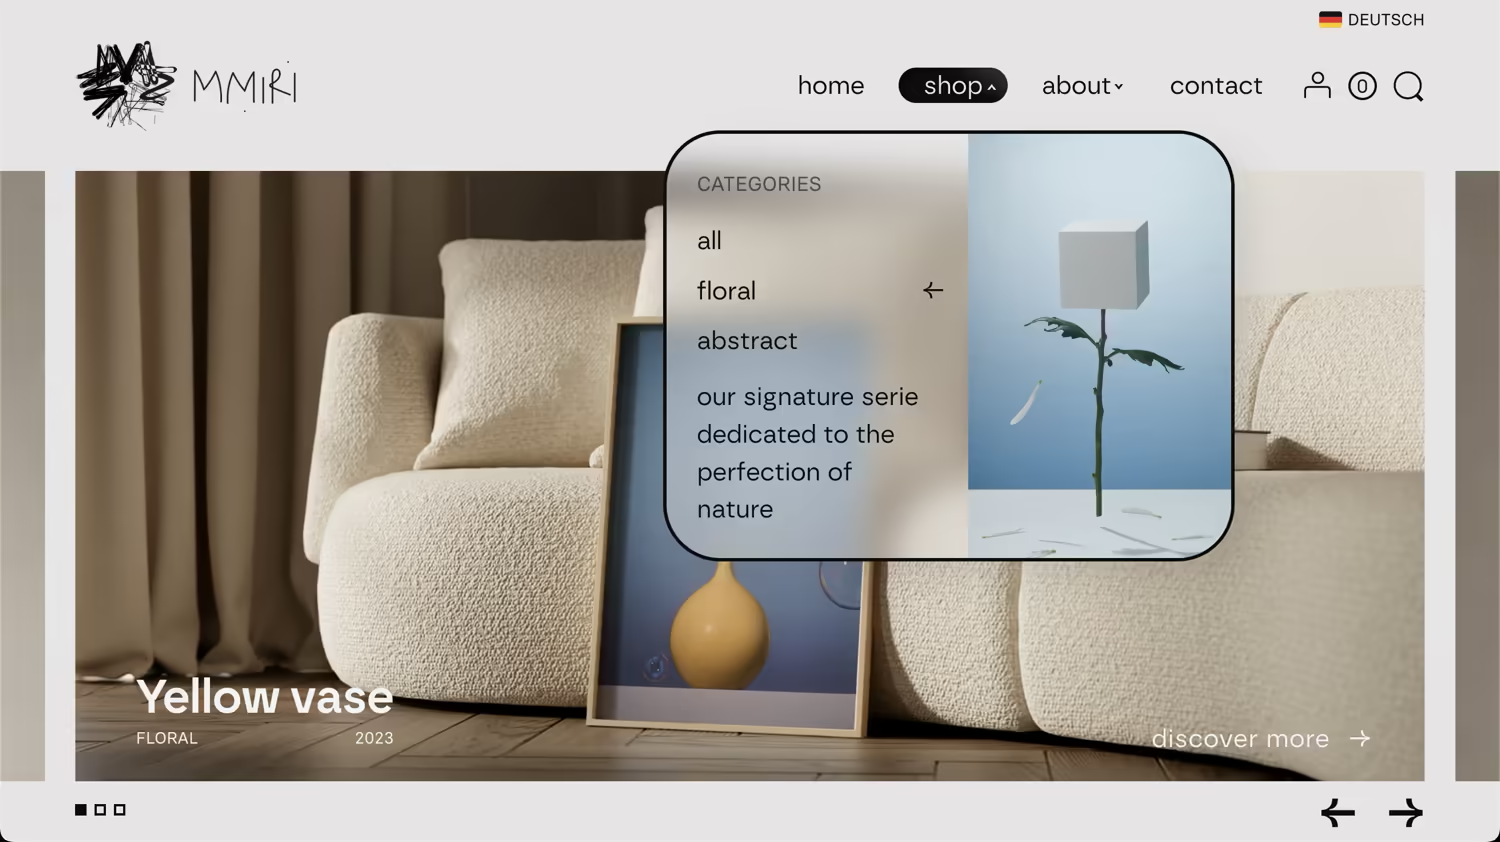
Last month, we finished building our WooCommerce-based online shop. It was a big project that took us about four months to complete. We are based in Germany but offer our prints throughout Europe, which made having a multilingual site one of the most important features.
In this article, I’ll share my experience, explore the different translation options on the market, and explain why I believe TranslatePress could be a top contender for your multilingual WordPress website. I should mention that I am not affiliated with the creators of the plugin and am using the free version myself.
How many languages do you need?
This is probably the first question every site owner has to answer. When I was first building our online shop, my initial plan was to offer translations in many European languages using AI, following the principle of “the more, the better.” However, after some initial experience, I changed my mind for two important reasons.
First, adding more languages means complying with the regulations of different EU countries. For an online shop, this alone can be a heavy burden for small entrepreneurs like us. Secondly, even with the best AI translation available, you still need to reserve a significant amount of time to review and improve the translations.
In this regard, offering just two languages—the native language of your primary market plus English for international customers—seems like the sweet spot. It’s affordable, easy to maintain, and covers most potential customers. In our case, we chose English as our main language and German, our local language, as the secondary one.
Different types of translation plugins.
There are two main approaches to translation plugins on the market.
The first approach involves plugins that work by duplicating content. They create a separate version of your pages, posts, and products for each new language. This can be a benefit or a drawback, depending on your specific needs.
- The main advantages: Your content can be completely different for each language. It’s like having separate sites for each region, all managed from a single WordPress installation. You also gain a more granular control over translations. Both versions of you website offer you the same WordPress native editing experience. You want to make some changes only to one of the translations? No problem! You open the corresponding page and the edits you make, don’t affect the other version in any way.
- The main disadvantages: You have to maintain all these different versions of every page, post, product or even a template separately. This can be very time-consuming and repetitive. And in my experience it increases the overall complexity of the site significantly. For an e-commerce site with hundreds or even thousands of products, it can also hurt performance by filling your database with many copies of your products. The most well-known plugins in this category are WPML and Polylang.

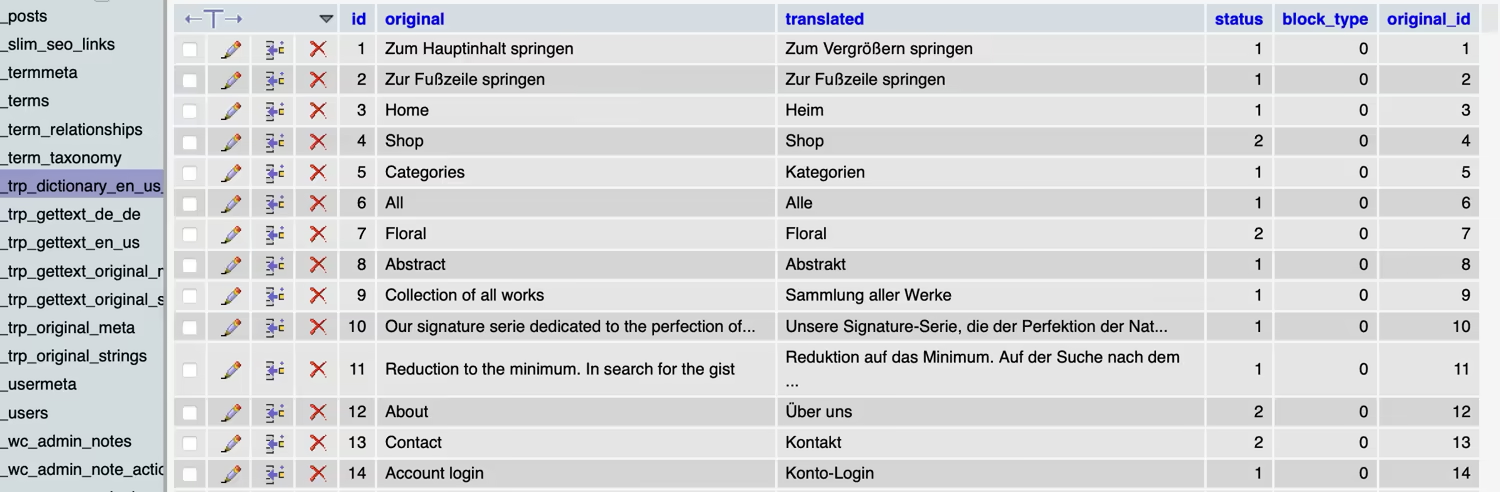
The second approach uses plugins that translate content dynamically. They save all translations in their own database tables and then generate a translated version of your page directly on the front end. This means that in your WordPress dashboard, your content exists only in its original language.
- The main advantages: You only have to maintain one version of your content. The entire translation process can be automated, and if you change your original content, all translated versions are updated automatically. In my experience this approach can be significantly more time efficient. And it also also doesn’t bloat your WordPress native database tables wich can have some performance benefits for more larger websites and also means, that if you don’t want to use the plugin anymore, uninstalling it and deleting all the translations takes just a few minutes.
- The main disadvantages: It’s much harder to create different content for different languages (it’s not impossible though). You are also loosing the native WordPress editing experience. That means, if you want to edit a translation manually, you have to rely on a plugins’s own proprietary interface instead of WordPress’s native, probably much more refined one.
These dynamic translators can be further divided into two subcategories:
- Cloud-based services (SaaS) that use their own servers, such as Weglot, GTranslate, and Linguise. These are incredibly easy to use and don’t put any strain on your server. The main issue hoverwer is the fact that you don’t own your translations; you can only use them as long as you pay for the service. If the company goes bankrupt, disappears or something else happens, your translations are probably gone.
- Self-hosted plugins that are installed on your site and save translations in your own WordPress database. They use resources of your own server to do all the heavy liftings, wich could negatively impact the overall performance of your site in comparison to Saas options. However, if anything goes wrong with the company developing the plugin, it want affect your site at least in the near term. These options can also be more affordable or even free. As far as I know, the main plugin in this category is TranslatePress.
So, what is the best option for you? I believe it comes down to two questions:
- Do you need to adapt your content for each language, or do you just want to offer the same content in different languages?
- How many resources do you have available? Are you able to maintain all those duplicates? (Remember, I’ll have to apply all the layout and design changes twice. The use of components can come very handy hear.)
If the answer to both of these question is yes, go for something like WPML or Polylang. If your site is rather complex and in the same time you want to offer the same content, just in several languages, the second type is probably much more convenient. Then you just have to decide between a cloud-based service and a self-hosted solutions like TranslatePress.
How does TranslatePress work?
As mentioned previosly, TranslatePress doesn’t duplicate your content. It helps you create translations, saves them in your database, and then automatically generates translated versions of your pages, posts, or products. When translating elements from other plugins (like the WooCommerce checkout or user dashboard), it uses the original translation files from that plugin, that are already stored in you WordPress database.
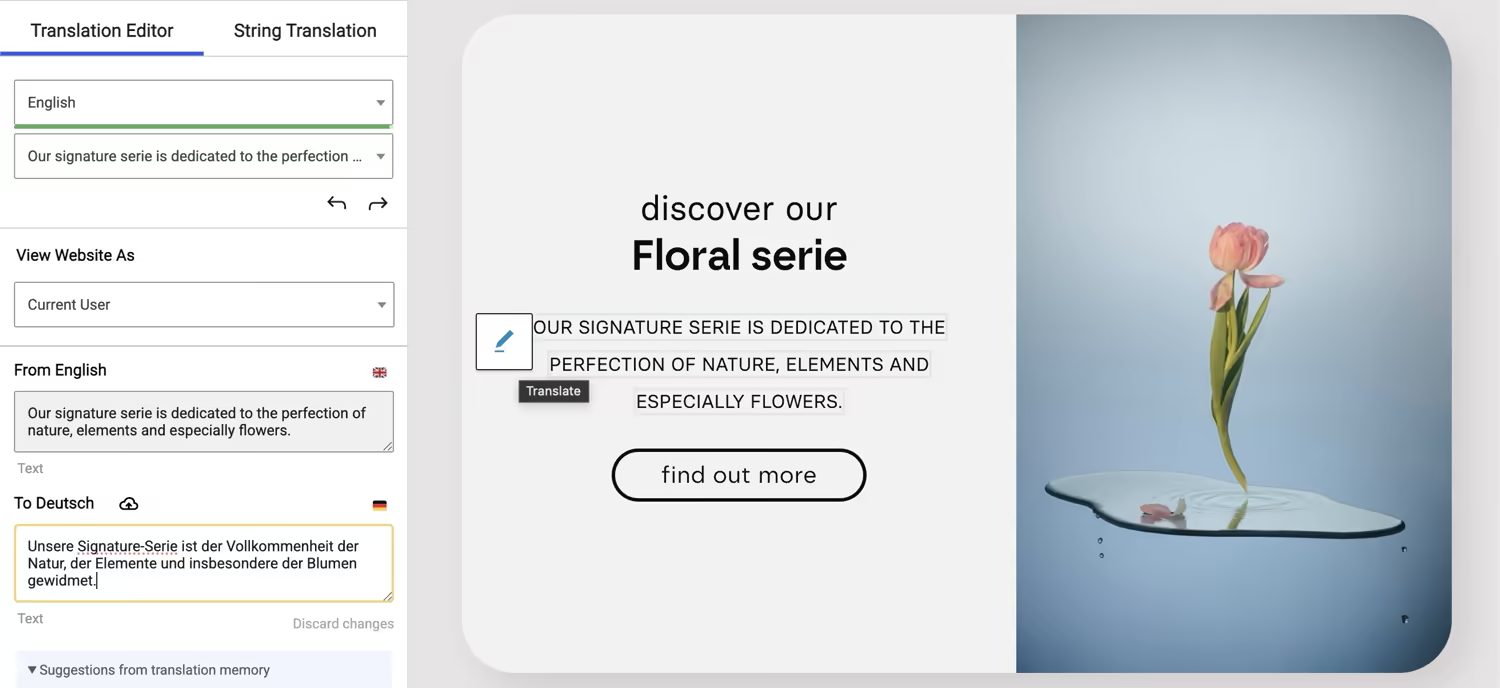
It also allows you to automate translations by utilising Google Cloud, DeepL, or TranslatePress’s own AI translation services. In the free version, you can only connect it to your own Google Translate API key. I’ll cover how to do that later in the article.
Performance of TranslatePress.
I’ve done some testing, and TranslatePress definitely adds some loading time to the translated versions of your pages. Original pages stay unaffected. Therefore it makes sense to carefully choose between the original and the translated languages for your website. However, thanks to its clean database structure and overall minimalist approach, overall it didn’t negatively affect the perceived responsiveness of our online shop.
It also comes with built-in database optimisation tools. Because the plugin saves its data in its own tables and not in WordPress’s main postmeta table (which often causes performance issues in large WooCommerce stores), you can remove the plugin without worrying about it leaving clutter in your database. There is a dedicated page with instructions on how to completely erase all stored data.
Performance-wise, cloud-based solutions like Weglot or GTranslate would probably win because they add no additional load to your server. You can even use Weglot without a plugin by just adding a bit of JavaScript code. However, this convenience comes at a cost, as these services tend to be the most expensive.
Connecting the Google Translate API with TranslatePress
If you choose the free version of TranslatePress, I highly recommend connecting it to the Google Translate API as soon as possible. (If you’ve bought the plugin, you get access to their proprietary translation AI and don’t need to do this). This is where the magic happens and what makes the overall package so powerful. I would even argue that if you don’t plan to use AI integration, Polylang might be a better option, as TranslatePress is a perfect match for automatic translation but less suited for manual work—the opposite of Polylang, in my opinion.
The only tricky part of this process, in my experience, was the initial setup in the Google Cloud interface. Fortunately, you only have to do it once, and your API key can be used on all your websites. You can find the the official guide on TranslatPress website, but here is a brief overview:
- First of all, you need a Google Cloud account.
- Next, create a billing account. It only accepts credit or debit cards as a payment method.
- Now, search for and enable the Cloud Translation API in your project.
- Once enabled, you can finally generate your API key.
- Copy the new key and paste it into the TranslatePress settings in your WordPress dashboard.
- Finally, check if everything is working.
From now on, your entire website will be available in the additional language (e.g., at www.your-website.com/de). You are also able to manually change and correct any of these translations. However, be cautious: each time you change your original content, TranslatePress may automatically generate a new translation, overwriting your manual edits. If this isn’t what you want, you can disable automatic translation after they are done or exclude specific parts of text from being translated by adding a CSS class to that element. These classes can be configured in the plugin’s advanced settings.
I also highly advise restricting your API key to work only with your own domain name. This adds an important layer of security.
Finally, a brief mention of the cost. The great thing is that this is a one-time cost for the initial translation. After Google has done its job, you can even disable your API key. The API is designed for heavy business usage, so for a typical brochure-style website, the translation will likely be free. To give you an idea of the prices, I was able to translate our entire online shop for less than two dollars.
My top 5 most useful tips
Here are a few tips to make your experience with the plugin more pleasant.
- Changing the default flags. I find the built-in flag icons a bit outdated. Luckily, it’s very easy to use your own. Download a set of SVG icons you like (I downloaded mine from here), optimize them with a tool like this, and upload them to your site. If you wish to optimise them even more, you can ask ChatGPT to strip the code even further. Then, go to TranslatePress Settings → Advanced and use the language code to create overrides (e.g.,
en_USfor American English orde_DEfor German). Add the links to your new flag icons, and you’re done! - Use classes to exclude elements from translation. Every translation plugin offers exclusion based on CSS selectors. I make a habit of adding a
.notranslateclass to elements that shouldn’t be translated. You can also create a class like.noaitranslateto prevent only automatic translation. Important: Don’t add these classes to navigation menu items, as TranslatePress will ignore them completely and won’t translate the links. - Consider the performance difference between languages. While TranslatePress offers good performance, there is still a small processing difference between your site’s native language and the translated versions. With this in mind, think carefully about which language will be your primary one. It’s probably best if most of your traffic lands on the original language version.
- Translate WooCommerce emails. If you also want to translate WooCommerce emails, activate the “
Show regular strings tab in String Translation” option in the advanced settings of the plugin (Settings → TranslatePress →Advanced tab → Debug). A new “String translation” tab will appear, where you’ll find all the strings from your email templates ready for translation. - Create a custom language switcher. The built-in language switcher was the thing I disliked the most about TranslatePress. I don’t like its look, and worst of all, it is incredibly hard to style with custom CSS. Fortunately, the documentation provides an easy way to create your own switcher with a little bit of PHP. I’m using a minimalist switcher that only shows a text link to the second language.
Update: In August 2025, the developers completely reworked the customization of the switcher, so it is likely much improved now. Still, if you’re more tech-savvy, a custom PHP switcher could be your thing.
<!-- Language Switcher -->
<?php
$languages = trp_custom_language_switcher();
$currentLanguage = get_locale();

foreach ($languages as $languageCode => $languageData): ?>
  <?php if ($languageCode != $currentLanguage): ?>
    <a href="<?= $languageData['current_page_url'] ?>" class="language-switcher"data-language="<?= $languageCode ?>"data-no-translation>
      <img src="<?= $languageData['flag_link'] ?>" alt="<?= $languageData['language_name'] ?> flag">
      <span><?= $languageData['language_name']?></span>
    </a>
  <?php endif; ?>
<?php endforeach; ?>
<!-- Language Switcher END -->
Also add the following snippet to you script manager or child theme to prevent TranslatePress from loading CSS code for it’s default switcher.
/**
 * Prevent TranslatePress language-switcher CSS from loading
 */
add_action( 'wp_print_styles', function() {
    wp_dequeue_style( 'trp-language-switcher-style' );
}, 20 );
Do you need the pro version?
The two main benefits of the paid version are the ability to add more than one additional language and the ability to translate SEO data like titles and meta descriptions. If two languages are enough for you, as they are for us, then translating SEO tags is probably the main reason to upgrade. If you’re serious about SEO, the upgrade is definitely worth the money. We decided we could upgrade later if needed.
Conclusion
It’s inspiring how quickly and easily you can set up a quality multilingual website using the combination of TranslatePress and the Google Translate API. I believe this is the plugin’s greatest strength and where it excels most.
And if you think I might be biased, let me add a point of clarity: this very blog uses Polylang instead of TranslatePress because I needed to keep full control over the German content, which is not a particular strength of TranslatePress. But if manually maintaining translated pages is not an option for you—as it wasn’t for our online shop—then TranslatePress is an amazing product.
Often, the free versions of premium plugins feel like stripped-down, frustratingly limited experiences. TranslatePress is a welcome exception. It provides a solid foundation for creating a bilingual website or shop on a tight budget. The only key missing feature is the translation of SEO tags. While this makes the Pro version a worthy consideration for serious business owners, its absence doesn’t affect the end-user experience, making the free version incredibly useful—especially here in Europe, where offering a second language can significantly expand your reach.
When it comes to front-end translators, my runner-up choice was GTranslate, which I came very close to choosing. However, the dependency on third-party servers for something as critical as translation pushed me to explore self-hosted solutions, and TranslatePress impressed me the most.
If you liked this article, you may want to check out other posts covering various topics about web design and online business. You might find my writings about photography and art enjoyable as well. Check it out!